> For the complete documentation index, see [llms.txt](https://docs.subwallet.app/main/llms.txt). Markdown versions of documentation pages are available by appending `.md` to page URLs; this page is available as [Markdown](https://docs.subwallet.app/main/web-dashboard-user-guide/account-management/import-accounts/import-by-qr-code.md).
# Import by QR code
Import your account using a simple and quick QR code scan.
## **Enable/disable your permission for camera access**
You will need to grant the SubWallet extension permission to use your camera in order to import via this method.
To enable this permission, please follow these steps:
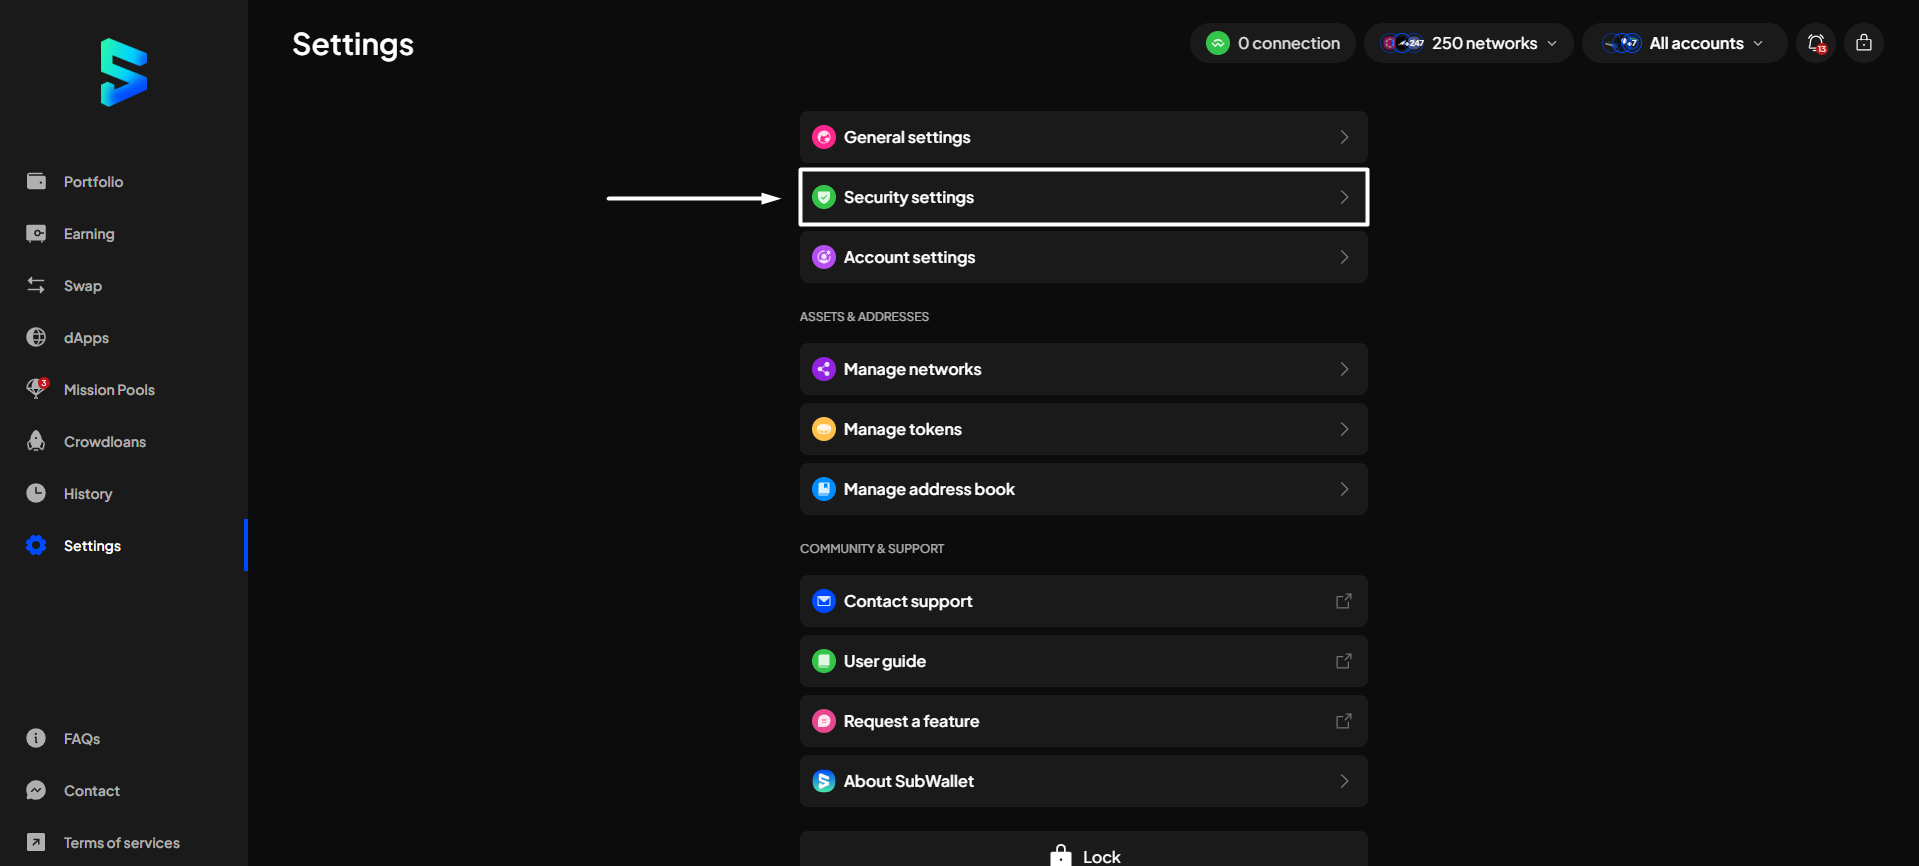
**Step 1**: On the SubWallet homepage, select the **Settings** tab on the sidebar to get to the settings.
**Step 2**: In the Settings screen, choose "**Security settings**".
**Step 3**: In the Security settings, switch the toggle next to "**Camera access for QR**" and approve the browser's popup to enable camera access.
{% hint style="info" %}
If you use the Brave browser, there will be multiple options that allow you to access the camera for different durations. You can choose the time option that best fits your personal preferences.

{% endhint %}
## **Import your account**
### If you're on the homepage
**Step 1:** On the SubWallet homepage, click on the account name in the upper-right corner to access the account selection tab.
**Step 2**: In the account selection tab, click the icon at the bottom of the screen.
**Step 3**: Choose "**Import by QR code**".
**Step 4**: Click "**Scan the QR code**".
{% hint style="info" %}
If you haven't enabled the "Camera access for QR" toggle in Security settings, SubWallet will show the following message:

To enable access, click on "Go to Setting" and then follow the steps provided in [https://app.gitbook.com/o/CyPU0v2iA12ILmupTKub/s/-Lh39Kwxa1xxZM9WX\_Bs/\~/changes/742/web-dashboard-user-guide/cold-wallet-management/connect-keystone-devices#enable-disable-your-permission-for-camera-access](#enable-disable-your-permission-for-camera-access)
Once done, repeat the connecting procedure.
{% endhint %}
**Step 5**: Present your QR code and scan it with SubWallet using your device's camera, or upload an image containing this QR code using the "**Upload from photos**" option.
**Step 6:** Once your computer recognizes the QR code, a popup screen will appear on the right side, asking you to enter the name of your account. Once done, click "**Confirm**".
**Step 7**: Your account is ready!
### If you're on the Welcome page
**Step 1**: Open [SubWallet Web dashboard](https://web.subwallet.app/). The welcome screen will appear.
Select the "**Import an account**" option.
**Step 2**: Make sure you read all the Terms of Use by clicking on the scroll-down button and agree with them by ticking the box beside "**I understand and agree to the Terms of Use, which apply to my use of SubWallet and all of its feature**".
Once done, click "**Continue**".
**Step 3:** A popup screen will appear on the right side. Choose "**Import by QR code**".
**Step 4:** Enter a strong password with at least 8 characters and tick "**I understand that SubWallet can't recover the password**".
{% hint style="info" %}
Password should contain at least 1 uppercase letter, 1 number, and 1 special character.
{% endhint %}
Once done, click "**Continue**".
Once you create a master password, you can follow the importing procedure provided in[#if-youre-on-the-homepage](#if-youre-on-the-homepage "mention"), starting from **Step 4.**



 icon at the bottom of the screen.


