> For the complete documentation index, see [llms.txt](https://docs.subwallet.app/main/llms.txt). Markdown versions of documentation pages are available by appending `.md` to page URLs; this page is available as [Markdown](https://docs.subwallet.app/main/web-dashboard-user-guide/network-management/customize-endpoint-provider.md).

# Customize endpoint/provider

### Understand network status

The connection of a network will not always be stable. When a network experiences high traffic or the endpoint/provider becomes unstable, network congestion may occur, making users unable to make any transactions on that network.

For each network, there are 3 network statuses that can occur. At SubWallet, we differentiate these statuses by displaying them with different wifi icon colors.

<table><thead><tr><th width="165" align="center">Wifi icon color</th><th width="176" align="center">Displayed in wallet</th><th>Meaning &#x26; Action needed</th></tr></thead><tbody><tr><td align="center">Grey</td><td align="center"><img src="/files/njQDh18DLUdfLKUo2zvM" alt=""></td><td>The network connection is <strong>unavailable</strong>. Please turn off the network and enable it back or change to another provider to restore network connection.</td></tr><tr><td align="center"><mark style="color:yellow;">Yellow</mark></td><td align="center"><img src="/files/5JG1WQQNfTsnVvaHHFsg" alt=""></td><td>The network connection is <strong>unstable</strong>. Please turn off the network and enable it back or change to another provider to restore network connection.</td></tr><tr><td align="center"><mark style="color:green;">Green</mark></td><td align="center"><img src="/files/kP2dEsZj5CKHwW85VUIS" alt="" data-size="original"></td><td>The network connection is <strong>normal</strong>. </td></tr></tbody></table>

### Personalize your network's endpoint/provider

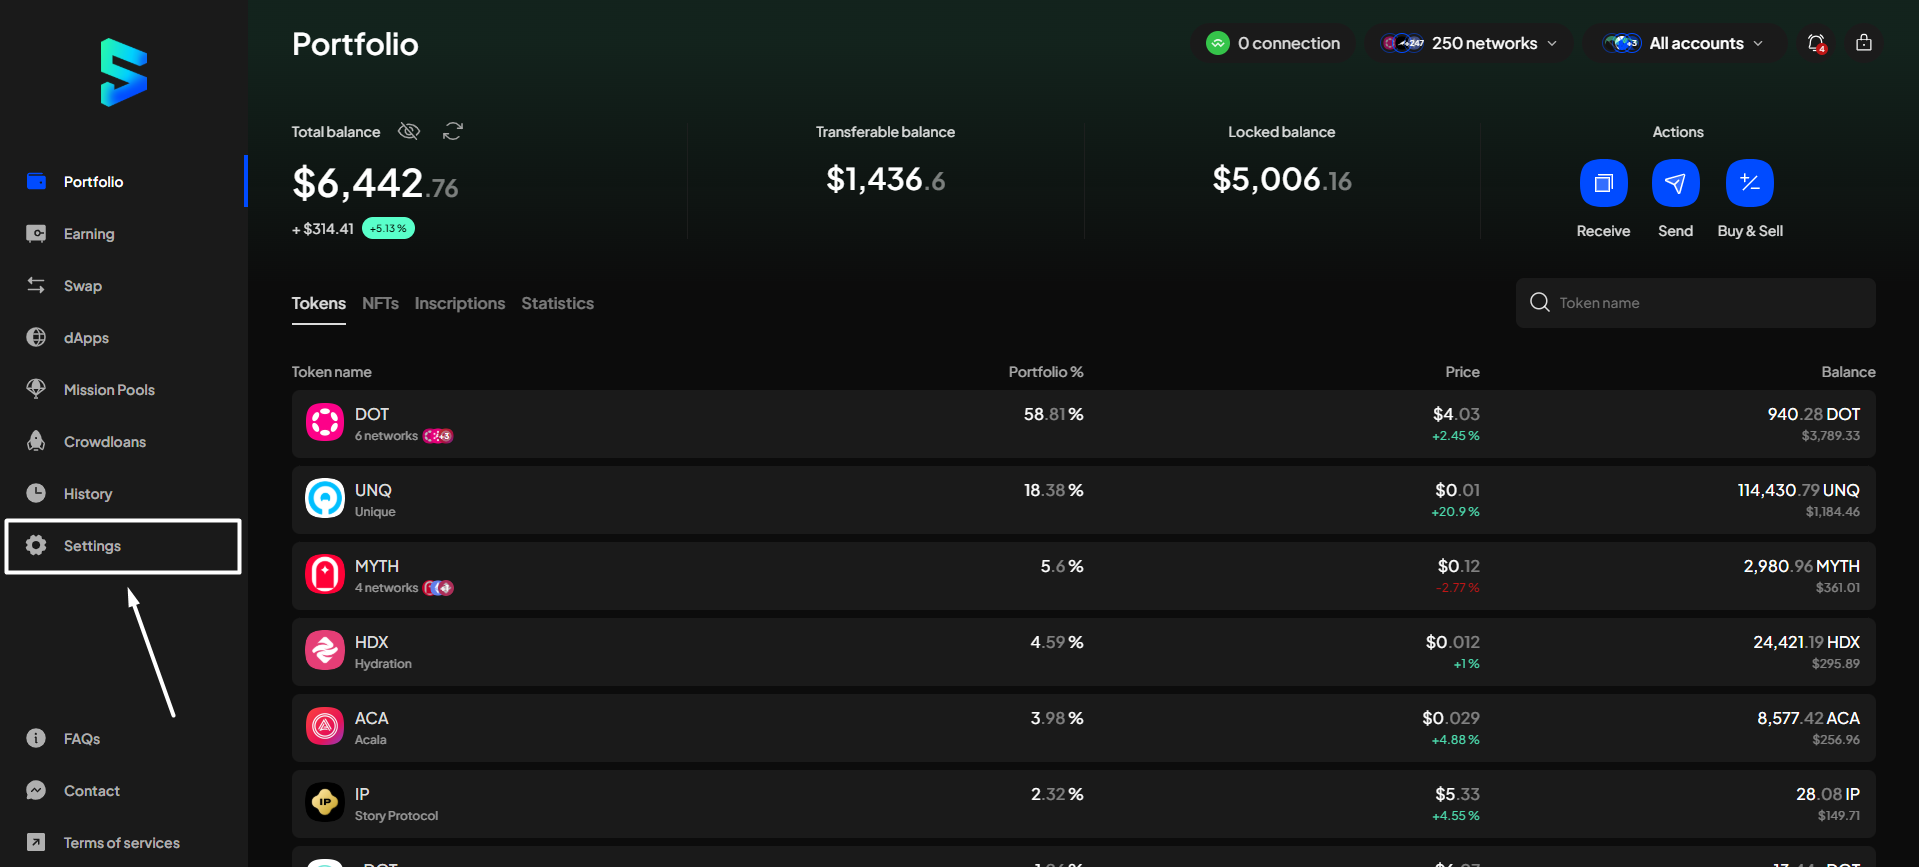
**Step 1**: On the SubWallet homepage, select the **Settings** tab on the sidebar to get to the settings.

<figure><img src="/files/IbBNXqIgtkIm6eSKLAwM" alt=""><figcaption></figcaption></figure>

**Step 2**: In the Settings screen, choose "**Manage networks**".

<figure><img src="/files/e4NJeQzITxjmsMzPadKc" alt=""><figcaption></figcaption></figure>

**Step 3**: Customize your provider by clicking the <img src="/files/VAwYiLwADCLViVQAzFd1" alt="" data-size="line"> icon next to the network for which you want to customize the provider.

*In this example, we are choosing Astar - EVM.*

<figure><img src="/files/Xn3OYXFdYCmd9Lbz47ql" alt=""><figcaption></figcaption></figure>

**Step 4**: In the Network detail section, click on the provider URL.

{% hint style="info" %}
If your selected network has only one provider, consider adding another provider/endpoint to rotate when the connection becomes unstable/lagging.
{% endhint %}

<figure><img src="/files/yawCKEbjcvSVE7OlE6b9" alt=""><figcaption></figcaption></figure>

**Step 5**: A modal will appear. Choose the provider you want to use from the list.

<figure><img src="/files/6CXj59JXGUXNZmeWXp8o" alt=""><figcaption></figcaption></figure>

{% hint style="info" %}
If you want to use a provider outside our supported list, click "**Add new provider**".

Check out this [guide](/main/web-dashboard-user-guide/network-management/customize-your-networks/manage-custom-networks.md) on how to add a new provider.
{% endhint %}

**Step 6**: Click "**Save**".&#x20;

<figure><img src="/files/kqMG22igZKlHpWT5ccZq" alt=""><figcaption></figcaption></figure>

You have successfully changed the endpoint of your chosen network!

<figure><img src="/files/y5tk6md8h9cDmJ3oUBth" alt=""><figcaption></figcaption></figure>