> For the complete documentation index, see [llms.txt](https://docs.subwallet.app/main/llms.txt). Markdown versions of documentation pages are available by appending `.md` to page URLs; this page is available as [Markdown](https://docs.subwallet.app/main/mobile-app-user-guide/asset-and-address-management/manage-address-book.md).
# Manage address book
Add, edit or remove your address book for quick and seamless transactions.
**Step 1**: On the SubWallet homepage, tap the list item at the top left corner to get to the Settings section.
**Step 2**: In the Settings section, select "**Manage address book**".
You will be directed to the address list.
Depending on what fits your needs, choose the appropriate tab below.
{% tabs %}
{% tab title="Add a new contact" %}
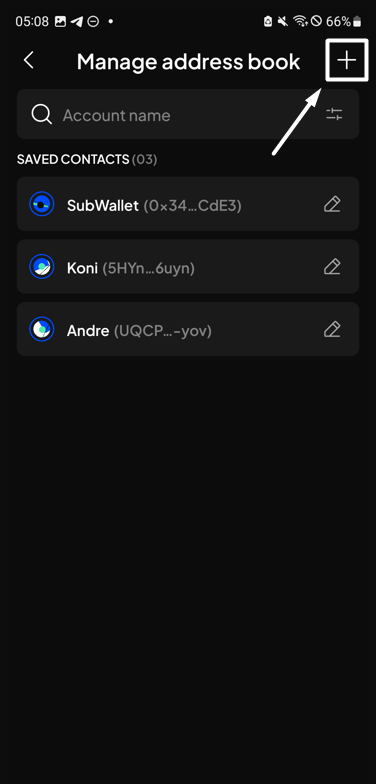
**Step 3**: Hit the "**+**" button at the top right corner to add a new address book.
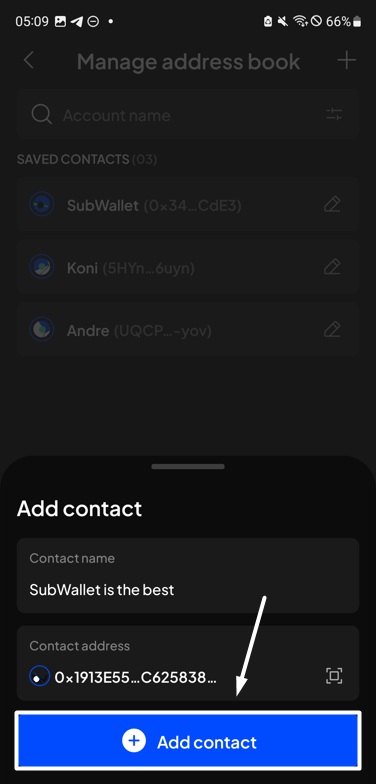
**Step 4**: Enter the contact name and address in the corresponding fields. Once done, hit "**Add contact**" to proceed.
{% hint style="info" %}
Currently, SubWallet supports 3 address types:
* Polkadot (Substrate) address
* Ethereum (EVM) address
* TON address
{% endhint %}
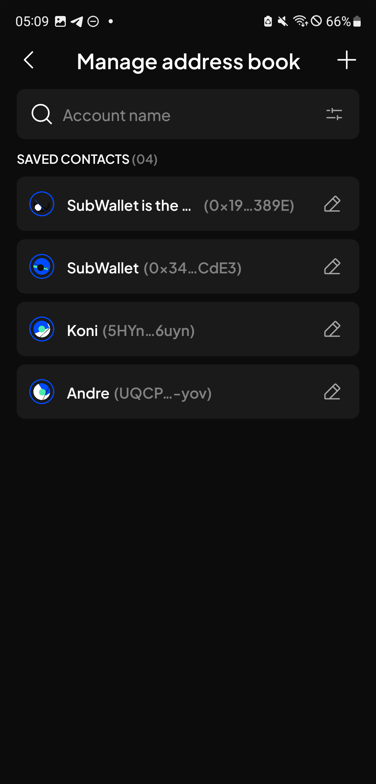
**Step 5**: Your contact has been saved to the address book!
This contact will instantly be available when you transfer tokens or NFTs.
{% endtab %}
{% tab title="Edit contact information" %}
{% hint style="warning" %}
SubWallet allows editing the contact name **only**.
{% endhint %}
**Step 3**: Select the contact you wish to edit by hitting the icon next to its name.
**Step 4**: Enter a new contact name, then hit "**Save**" for SubWallet to save the new name.
**Step 5**: You have successfully renamed your contact!
{% endtab %}
{% tab title="Remove contact" %}
**Step 3**: Choose the contact you wish to remove by hitting the icon next to its name.
**Step 4**: Tap the bin item at the bottom left corner.
**Step 5**: A confirmation screen will appear. Hit "**Delete**" to confirm the removal.
**Step 6**: You have successfully removed a contact from the address list!
{% endtab %}
{% endtabs %}



 icon next to its name.


