> For the complete documentation index, see [llms.txt](https://docs.subwallet.app/main/llms.txt). Markdown versions of documentation pages are available by appending `.md` to page URLs; this page is available as [Markdown](https://docs.subwallet.app/main/mobile-app-user-guide/connect-dapps-and-manage-website-access/add-new-networks-unavailable-in-pre-defined-list-from-dapp.md).
# Add new networks unavailable in pre-defined list from dApp
Add custom networks that aren't in the pre-defined list on SubWallet from dApp.
{% hint style="info" %}
Currently, SubWallet supports adding new EVM & Substrate networks.
{% endhint %}
**Step 1**: On the SubWallet homepage, press the "**dApps**" tab at the bottom of the screen.
**Step 2**: Search for the dApp you want to access by typing on the search bar or selecting a dApp in the Recommended section.
*In this example, we are connecting to Chainlist.*
{% hint style="warning" %}
As ChainList is a list of EVM networks, MetaMask will be its default wallet for connecting. Therefore, if you want to connect via SubWallet, disable the MetaMask extension first.
{% endhint %}
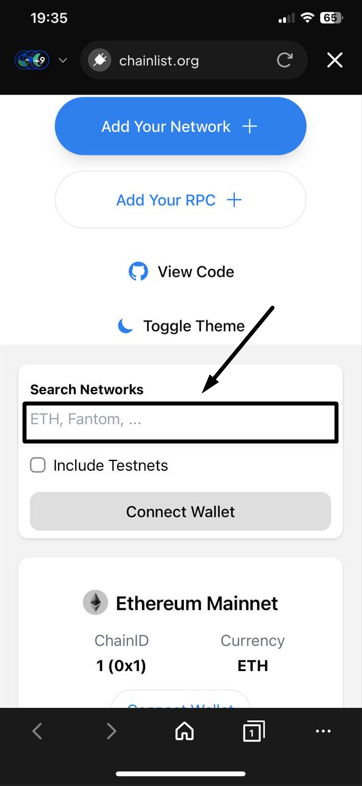
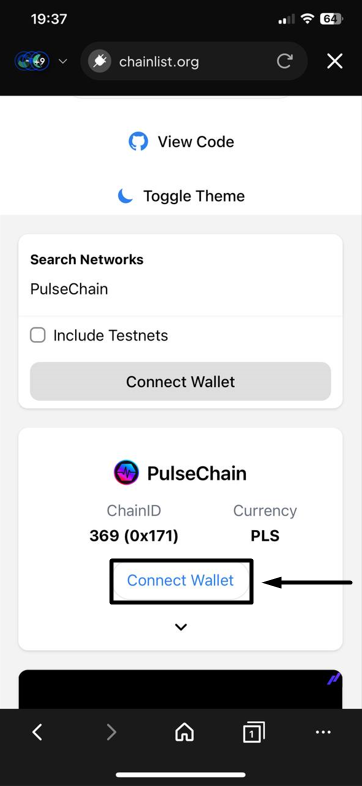
**Step 3:** After successfully accessing the dApp, scroll down and select the network you want to add by typing on the search bar. Once done, hit "**Connect Wallet**".
*In this example, we want to add the PulseChain network.*
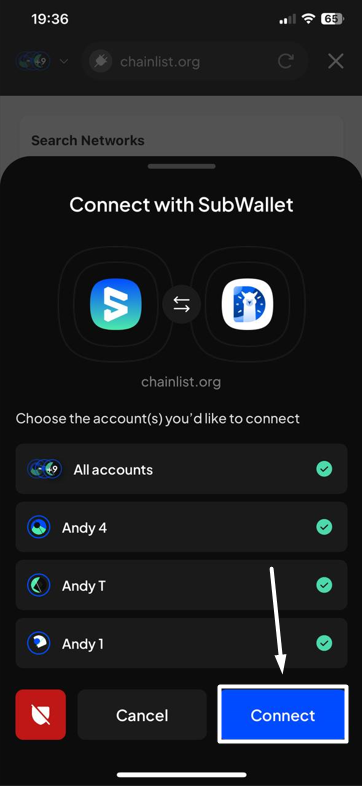
**Step 4:** A popup will appear. Select the account(s) in which you want to add the network, then press "**Connect**".
**Step 5**: Once you've selected the account(s), the initial popup will be closed, and another popup will appear, asking you to confirm the add network request. Check the request details, then hit "**Approve**" to add the network.
**Step 6**: You've successfully added a custom network from dApp! To find your newly added network, follow this [guide](/main/extension-user-guide/network-management/customize-your-networks/manage-custom-networks.md).